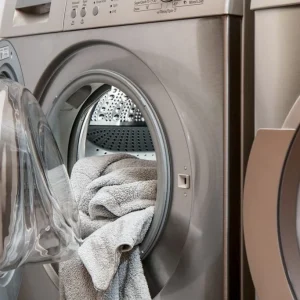
As winter approaches, homeowners face the annual challenge of keeping their pipes from freezing. When temperatures drop, water inside the pipes can freeze and expand, causing the pipes to burst. This often leads to expensive repairs, water damage, and major disruptions. While many people turn to complicated or costly solutions, my aunt discovered a surprisingly simple trick that requires almost no effort.
Understanding the Risks of Frozen Pipes
Frozen pipes can do far more than interrupt water flow—they can cause severe structural damage. As water turns to ice, it expands with enough pressure to crack or burst the pipe. The resulting leaks often cause mold, warped floors, damaged insulation, and thousands of dollars in repairs. Insurance reports show that burst pipes can cost anywhere from $5,000 to over $70,000 depending on the severity of the damage.
The Simple Trick My Aunt Swears By
Her method combines foam pipe insulation with a small, safe, thermostatically controlled space heater placed in the same room—not directly against the pipes. The insulation keeps heat in, while the gentle ambient warmth helps keep the entire area above freezing. This approach is inexpensive, requires minimal setup, and adds an extra layer of protection during the coldest nights.
How the Trick Works
-
Foam insulation reduces heat loss from the pipes, helping maintain the water’s temperature.
-
A low-wattage heater, placed safely in the room or cabinet, keeps the air warm enough to prevent freezing.
-
Together, they help maintain a stable temperature around vulnerable pipes without constant monitoring.
Step-by-Step Guide
-
Purchase foam pipe insulation from a hardware store.
-
Measure the pipe length and cut insulation to size.
-
Snap the foam around the pipes and secure with tape if needed.
-
Place a low-wattage, tip-over-safe, thermostat-equipped space heater in the room or nearby open cabinet—not touching the pipes.
-
Set the heater to a low temperature or connect it to a timer for extremely cold periods.
While this trick is simple, safety should always come first. Never place a heater directly against pipes, insulation, or flammable materials. Make sure the heater has automatic shutoff features such as tip-over protection and overheat sensors. Keep the surrounding area clear, and avoid using extension cords. If you’re placing the heater inside a cabinet, leave the door slightly open to allow proper airflow.
Extra Precautions for Extreme Cold
During prolonged cold snaps, a few additional steps can provide extra peace of mind:
-
Let faucets drip slightly: Moving water is less likely to freeze, especially overnight.
-
Open cabinet doors: This allows warm air to circulate around pipes under sinks.
-
Seal drafts: Use weather stripping or caulk to block cold air near pipes, especially in basements, crawl spaces, and exterior walls.
-
Maintain consistent indoor heat: Avoid turning the thermostat too low at night, even if you’re away.
These small actions work well alongside insulation and gentle heating to create a strong defense against freezing.
Why This Method Is So Effective
What makes this approach stand out is its balance of efficiency and simplicity. Foam insulation minimizes heat loss, while the heater stabilizes the surrounding air temperature rather than overheating the pipes themselves. Unlike heat tape or complex plumbing systems, this method doesn’t rely on constant electricity draw or professional installation. It’s easy to check, adjust, and reuse every winter.
Final Thoughts
Frozen pipes are one of winter’s most expensive and stressful surprises—but they don’t have to be. With a small investment and a few minutes of setup, this simple trick can save homeowners from major repairs and costly water damage. My aunt has used this method for years, even during harsh winters, without a single burst pipe. Sometimes, the smartest solutions aren’t the most complicated—they’re just practical, well-thought-out, and easy to maintain.