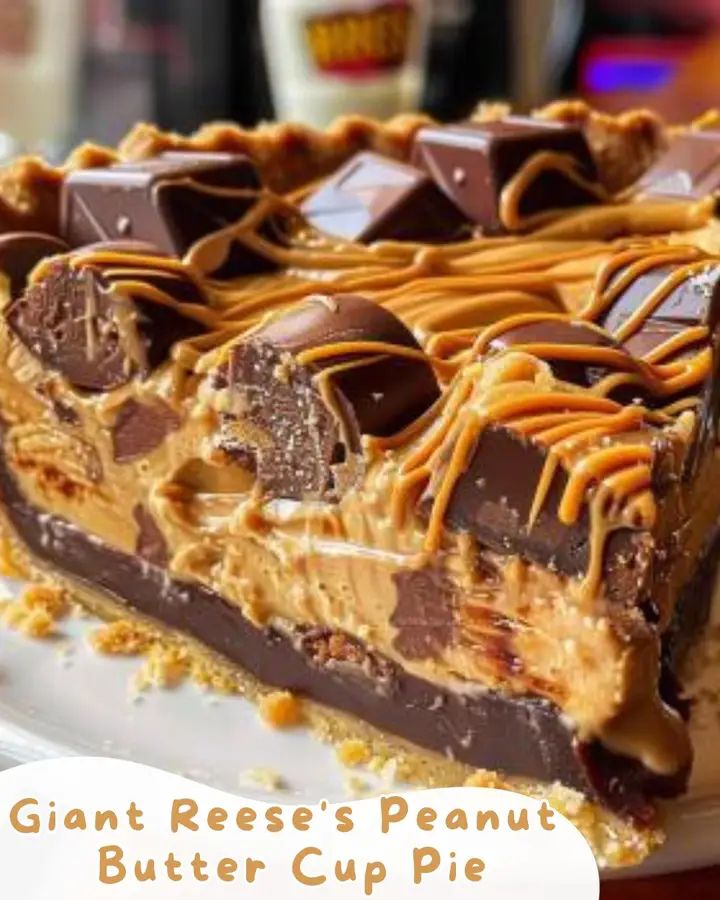
If you love the classic combination of chocolate and peanut butter, this Giant Reese’s Peanut Butter Cup Pie is the ultimate dessert to make at home. It has a crunchy chocolate cookie crust, a rich and creamy peanut butter filling, and a smooth chocolate ganache topping that makes every slice taste like an oversized peanut butter cup.
This no-fuss dessert is perfect for birthdays, holidays, potlucks, family gatherings, or any time you want to impress peanut butter lovers. It looks beautiful on the table and tastes even better after chilling.
Ingredients
For the Chocolate Crust
- 2 cups chocolate graham cracker crumbs
- 1/4 cup granulated sugar
- 1/2 cup unsalted butter, melted
For the Peanut Butter Filling
- 1 1/2 cups creamy peanut butter
- 1 cup powdered sugar
- 8 oz cream cheese, softened to room temperature
- 1 teaspoon vanilla extract
- 1 1/2 cups whipped topping or whipped cream
For the Chocolate Ganache
- 1 cup semi-sweet chocolate chips
- 1/2 cup heavy cream
Optional Garnishes
- Mini Reese’s Peanut Butter Cups
- Crushed peanuts
- Whipped cream
- Chocolate drizzle
Instructions
Step 1: Prepare the Crust
Preheat your oven to 350°F (175°C).
In a medium bowl, combine the chocolate graham cracker crumbs, granulated sugar, and melted butter. Stir until the crumbs are evenly coated and the mixture resembles wet sand.
Press the mixture firmly into the bottom and up the sides of a 9-inch pie pan.
Bake for 10 minutes, then remove from the oven and let the crust cool completely.
Step 2: Make the Peanut Butter Filling
In a large mixing bowl, beat the softened cream cheese, creamy peanut butter, powdered sugar, and vanilla extract until smooth and creamy.
Gently fold in the whipped topping or whipped cream until the filling becomes light and fluffy.
Step 3: Fill the Crust
Spread the peanut butter filling evenly into the cooled chocolate crust. Smooth the top with a spatula.
Step 4: Make the Chocolate Ganache
Place the chocolate chips in a heat-safe bowl.
In a small saucepan, heat the heavy cream over medium heat until it just begins to simmer. Do not boil.
Pour the warm cream over the chocolate chips and let it sit for 2 minutes. Stir until the chocolate is fully melted and the ganache is smooth and glossy.
Step 5: Add the Chocolate Layer
Allow the ganache to cool slightly, then pour it over the peanut butter filling. Spread it evenly across the top of the pie.
Step 6: Chill the Pie
Place the pie in the refrigerator for at least 2 hours, or until fully set.
Step 7: Garnish and Serve
Before serving, decorate the pie with mini Reese’s Peanut Butter Cups, crushed peanuts, whipped cream, or extra chocolate drizzle.
Slice and serve chilled.
Serving Suggestions
This rich peanut butter cup pie pairs perfectly with:
- A glass of cold milk
- Hot coffee
- Vanilla ice cream
- Fresh strawberries
- Extra whipped cream
- Chocolate sauce
Tips for the Best Peanut Butter Cup Pie
Make sure the cream cheese is fully softened before mixing. This helps create a smooth, creamy filling without lumps.
For easy slicing and removal, you can make this recipe in a springform pan instead of a regular pie dish.
Use good-quality chocolate chips for the ganache because the chocolate flavor is one of the stars of the dessert.
Let the pie sit at room temperature for about 5 to 10 minutes before slicing if it has been chilled for several hours.
Storage
Store the pie covered in the refrigerator for up to 5 days.
For longer storage, freeze the pie without garnishes for up to 1 month. Thaw in the refrigerator before serving.
Final Thoughts
This Giant Reese’s Peanut Butter Cup Pie is a rich, creamy, and chocolatey dessert that is perfect for peanut butter lovers. With its chocolate crust, fluffy peanut butter filling, and silky ganache topping, it is an easy homemade treat that tastes just like a giant version of everyone’s favorite candy.